Pages

Friday, September 28, 2012

Macadamia Shortbread Cookies


Still Reeling from our trip to Maui, I was inspired to make something to keep the spirit of Hawaii alive just a bit longer.  I am obsessed with Macadamia nuts and ate my fair share while on the trip. Of course I brought some home with me as well as Caramacs, which are to die for but that's another story entirely.  Since I had some roasted Macadamias on hand and have been wanting to try making shortbread, I decided to combine the 2 ideas.  Two tasty components can't possibly make a bad combination, I thought.  Well, I am not always right in thinking so believe me. This time thank goodness I was correct.   It was an experiment as many of my recipes are.  I almost never use a recipe as is b/c it's so much fun to tweak minor ingredients and see what you can create.  I am happy to admit - it worked out this time YAY!
I am definitely going to feel in danger with these little triangles lurking around the apartment.  What I didn't mention was that I made two pans of shortbread - YES 2!  I will have to do a Serious give away.  Luckily and excitingly I will be seeing lots of family and friends this weekend. It will be a Birthday Friday and a HS Reunion on Saturday.  Cookies for ALL!  I can't wait to see everyone to celebrate new chapters in life and old memories.  Should be a great fun filled weekend :)  Hope you have a wonderful weekend as well :) HAPPY FRIDAY!


Yield: 12 Shortbread Cookies

Ingredients:
1 1/2 cups Flour (All Purpose)
1/4 cup RAW Sugar
3 tablespoons Light Brown Sugar (firmly packed)
1 1/4 Cup Sweet Cream Butter – If you use salted butter you can cut out the salt altogether. I still added it.
1/2 cup chopped Roasted Macadamia Nuts – you can buy already roasted nuts.
1/8 tsp Salt 
1/4 cup Cornstarch
1 tsp Pure Vanilla extract
Melted Chocolate for dipping - optional if you enjoy plain shortbread (I used 1/2 bag Ghirardelli semi-sweet choc. chips)

Directions:
1. Preheat Oven to 300°F or (150°C)
2. In a medium bowl sift  together flour ,corn starch and salt). Once sifted stir in the macadamia nuts.  Set aside.
3.  Using a hand mixer or wooden spoon, combine butter and sugars in a large mixing bowl.  If using a hand mixer beat on medium speed about 3 minutes or until creamy. Mix in Vanilla. 
4.   Slowly add the dry ingredients to the butter mixture and beat on low speed (or mix by hand) until the dough comes together.  If the mixture is well blended but till remaining in small balls from the nuts, use your hands to gently knead the dough into one soft ball.
5. Use an offset spatula (as pictured below) to smooth dough into a 9 ½  inch tart pan with removable bottom.  If you do not have a removable bottom tart pan than you can use a traditional tart pan or round cake pan lined with parchment paper.  (I used the traditional tart pan with parchment paper cut to size.) Be sure to press into the edges if using a tart pan.
6. Using a Sharp knife make shallow cuts in the Shortbread into 12 even triangles.
7. Poke holes with a fork in a circular form several times covering the entire shortbread (as shown below.)
8. Bake for about 55 minutes.  Top should be golden brown.
9. Remove shortbread from the oven.  Re-trace the shallow cuts with a sharp knife and cut all the way through while shortbread is still warm.
10.    Allow the shortbread to cool while still In the pan and placed on a wire rack for 30 minutes.
11. Once cooled remove the bottom of the pan (if using a removable bottom) or remove the shortbread by lifting out the parchment paper. Slide cookies off tray or parchment paper

For chocolate Dipping:
1. Use a small double boiler or a heat-proof bowl over a saucepan with simmering water.  Allow chocolate to melt slowly while stirring constantly.  You can watch this youtube video for help on how to melt chocolate.
2. Dip 1/4 of the each triangle in the melted Chocolate and let cool on wax paper for at least one hour.
3. Share and ENJOY :)

*Store in an airtight container to retain freshness.


Tuesday, September 25, 2012

Maui Recap


Now back home after a glorious week in Maui.  I'm sure that most of us would agree that it is very difficult to come back to the reality of every-day life after a relaxing vacation.  This vacay felt like it flew by faster than any other.  Before I could say "Aloha" we were already packed and headed for the airport leaving my favorite place on Earth - Hawaii.  I was sad to leave the life of pure serenity and slightly disappointed because I didn't think we had taken enough pictures while there.  When I uploaded all pics from my camera and phone I was pleasantly surprised at how many we did actually take during our trip.  Its never an easy task to take pictures of yourself when your on a single couple vacation, without constantly asking a stranger to take it for you. Since that was the case most of our pics are scenic, which I always LOVE. Oh and I should also mention that I take lots of pictures of feet.  I don't know why but I think they make cute pictures :)

I will be 100% honest on my rating of Maui.  I am only able to rate it against two other Hawaiian Islands, (Big Island and Oahu) since they are the only other islands I have traveled amongst.  I rate Maui # 3 out of 3.  I can't say enough about the Big Island and all of its endless possibilities.  There is so much to do and see and the biggest problem is trying to decide what you can fit in during your stay.  Oahu is a place that I have spent a huge chunk of time and so I am very familiar with the entire island.  I could live on the North Shore and be totally content.  Maui is great for a honeymoon and also a great stop if you plan to island hop.  Don't get me wrong, its beautiful and relaxing!  There are activities and other small road trips to make but it doesn't suit my vacation preferences the way the other 2 islands have in the past.  If you have always wanted to go to Maui you should totally do it.  I always wanted to go and I am glad I did.  You never know until you try it for yourself. If you do make the trip you are in for a relaxing treat :)


Fred's Mexican Cantina in Kihei.  So Yummy that we couldn't resist going back a 2nd time.
Baja Fish Tacos @ Fred's

Coffee from our Room - My kind of start to a morning.  I'm in the coffee pot haha.
Macadamia nut-crusted Mahi-Mahi with mashed purple Yams.  Don't let the color trick you, this was beyond delicious!
Fresh Sushi

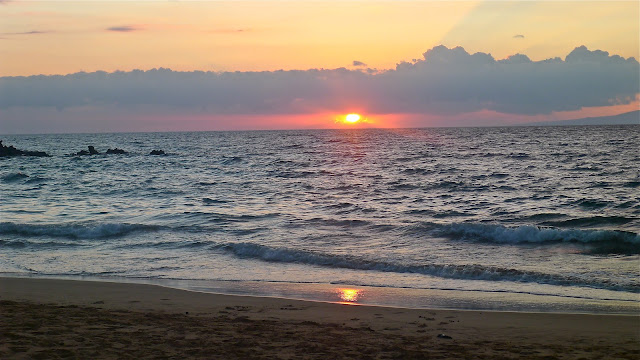
Sunset @ the Four Seasons, Maui

Big Beach, Maui.  This Beach is very "big" which makes it easy to stake out a quiet place to soak in the sun.  If you head in one direction to the right of the entrance beyond the Big Rock,  you will be on the "Nude" side of the beach. We did not venture to that part of the beach but it is available for those who prefer that scene.
When we left we flew over the island of Lanai.

Thursday, September 20, 2012

Travel Tips and Essentials

photo source
This week I am off on Holiday, well vacation to most of you but doesn't "Holiday" sound so much cooler!?  I've always wanted to say that.   I thought I would post an entry on travel since after all that is what I am up to right now and this is my one big trip of the year.  I am excited to say that Maui will be my home away from home for this week.
Anyway, packing is something that I dread to the highest degree.  It creates stress  and indecisiveness for me.  While I absolutely love to travel, the anxiety of the preparation can really become overwhelming if I am not properly prepared.   Over the years I have learned a few tricks that help to ease my stress at least partially.  Oh and I should mention that I am a bit of a germ-a-phobe and a suitcase hoarder as you will see.

photo source
 Making a packing list is a must if you want to feel secure about packing everything you need. It can also serve as a reminder for any last minute items that you may need to purchase for your travels. There are several various types of packing lists out there that can help you get your packing routine organized from the start. Here is one list in particular that I like. Also you can find the packing checklist above at Give Simple.   I  start gradually setting things aside for my trip 1 week prior to traveling.

The bag line-up
Choosing the proper bag is key.  How long will you be away?, is this trip warm weather or cold?, do you have to carry-on?  All of these factors should help you choose the right sized bag. My bag of choice is always a rolling Duffle bag because of it's ability to expand and create ample space. Burton makes several great rolling duffles in my opinion.  I have way to many suitcases (above) to choose from which I why I referred to myself as a suitcase hoarder. All shown in this pic are Burton bags.  Ultimately I went with the small black bag above but in a plaid version for this trip.  This bag is small enough to be a carry-on which I needed since I only have 45 minutes between landing and my connection flight.  I am not going to offer tips on how to actually pack your suitcase since I struggle myself as an over-packer.  I am all ears for your tips!
If you have products that you are very particular about, invest in the travel size.  This is my face regimen.  I bought the travel size to try it out the first time.  When I knew I liked this product I bought the full size and saved the minis for traveling. Now I can always refill the minis with the full sized products.  Using all travel sized toiletries really saves suitcase space (for that extra pair of heels you really want to squeeze in.)
Above are my carry-on personal essentials.
Having the perfect carry-on bag cuts down my stress level tremendously. I almost always go with a large tote bag that can fit all of my essentials and also another small purse.  Here is what you will find in my bag:
1. Downy Wrinkle releaser (in case you need to de-wrinkle promptly after de-planing)
2. Mini Lysol spray for the fabric seating on the plane. 
3. Clorox wipes to wipe down everything on the plane from the seatbelt to the tray table. 
4. Evian spray to keep your face hydrated during the flight. 
5. Tide to go pen for unexpected spills and stains 
6. Purell for obvious reasons 
7. Travel sized perfume roller 
8. Gum for ear popping prevention 
9. Lipgloss for moisturized lips with a hint of color
10. Socks (If I am not wearing any)

Above are my carry-on basic essentials.
1. Lap-top
2. Charger 
3. Phone
4. Phone charger
5. Headphones
6. Sunglasses 
7. Camera
8. Camera charger
9. Book
10. Pen and paper 
11. ID and/or Passport 
12. Keys (not shown)
13. Wallet (not shown)
14. Jewelry (not shown)


The perfect traveling outfit is a personal choice for everyone.  I prefer comfort but not to the degree of looking like I just rolled out of bed, though PJs always sound temptingly cozy. I'm not gonna lie, I kinda look like a slob in the above pic but I was running on no sleep.  I prefer to wear layers since the plane temperature is always somewhat unpredictable.  I usually opt for comfortable jeans, a light t-shirt or blouse, a cardigan or light jacket, and flats since they are easily removable for security. You can also check out Cupcakes and Cashmere where Emily Schuman offers great tips on what to wear to the airport and other helpful travel hints. 

To Sum it all up:
1. Make a packing list
2. Choose the proper sized suitcase
3. Use travel sized toiletries
4. Create your perfect carry-on bag
5. Wear the perfect outfit for your flight

I would Love to hear if you have any tricks to traveling, please do share.
Have a great rest of the week! :)

Friday, September 14, 2012

DIY: ChalkBoard Calendar


So we all know there is quite a chalboard craze these days.  I mean people are using chalkboard paint on everything from canisters, kitchen cabinets, and even entire walls.  I have long been a lover of chalkboards and have wanted one for quite some time now.  I wasn't sure where I could fit a large chalkboard and it didn't really make sense to just buy one without a for sure spot.  I have definitely been feeling on the disorganized side ever since we moved. I thought it may be cool to get organized on a CHALKBOARD!  hey why not?  You can make anything into a chalkboard with trusty chalkboard paint.  I opted for the spray chalkboard paint since I heard you can sometimes see the brush marks with the traditional kind.  
The biggest hurdle was coming up with the best object to use for such a project and the color in which I should paint it.  Well, I immediately thought that a glass paneled window would be easiest or even a mirror but both looking a little pricey for something with an unknown outcome.  I ultimately went with a distressed white picture frame from Pier 1 Imports with six windows.  Since there are 7 days of the week Saturday and Sunday had to share a window.  If I had found an 8 paneled window frame I think it would have been better and there would be an extra window for notes........my suggestion to anyone who finds one - use it. The color I chose was metallic metal to try and match my kitchen island hardware.  It wasn't a perfect match but it works for now.  I may change the color eventually.


Here is the white frame that I started with.  I then took a piece of basic sand paper and sanded it down a bit more to create and even more distressed look.
I removed the glass windows and painted them with the chalboard paint.  I let it dry overnight.
I spray painted the white frame with the metallic paint and let it dry over night.  The next day I distressed it a bit more with sandpaper. I wanted to make more cracks in the paint for some black paint to soak in.  I thought adding black paint  may make the gold paint appear more like an aged metal. 
 I sprayed a black paint into a bucket and then a bit of gold to lighten it to a gun metal color. I then used a small brush to apply the gun metal color into the distressed parts of the wood.  I did not completely cover the frame I randomly chose spots to apply the dark paint so it didn't look unnatural.
About 30 minutes after the gunmetal color was applied, I gave one final Metallic coat to even out the surface.
 I let the whole thing dry overnight.  The next morning I inserted the NOW chalkboard windows back into the frame.
Now for the fun part.  Time to draw the calendar.  This can obviously be done in anyway you see fit.  Below is the format I chose and a close-up of the final paint texture.

I am sure there are several ways to distress and re-paint.  This was my first time so if you have any suggestions as to a method that may work better please suggest away, I am all ears.  Like I said before I may repaint this another color or may strip and stain it a dark brown like the perimeter of the kitchen island it is resting upon.  I like change and get bored often :) Also I thought it would be cool to put a metal plate and the very top-middle of the frame and spray paint with chalkboard paint, this could be used to label the calendar month.  
To the right are the paint products that I used. (Krylon chalboard paint, Krylon black satin indoor/outdoor,& Rust-oleum metallic paint.)
HAPPY FRIDAY!